Full demonstraton
The following example shows how to transfer a file from your computer to the Aurora system, submitting a job, and retrieving data. The example assumes that you have two basic programs installed on your computer— WS_FTP, and CRT Telnet (both are available from the Department of Information Technology, and can be installed on your computer at no charge).
Uploading Your Source Code
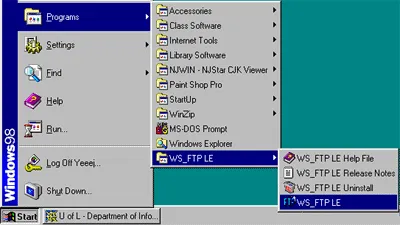
To upload your source code, you will need to start WSFTP. Start WSFTP by going to your Start menu, choose Programs, then choose WS_FTP LE
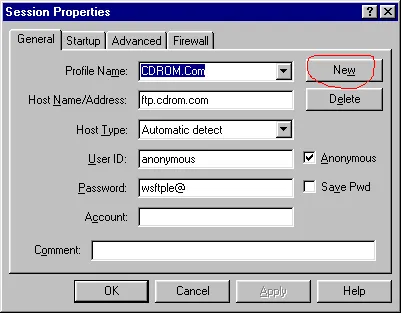
We need to fill out the boxes with information. You may call the profile name whatever you wish. In this case, we have called it: U of A - Aurora Then for the Host Name/Address box, enter: aurora.nic.ualberta.ca For the User ID, enter in your assigned user name which was given to you by the U of A technical contact. And lastly, for the password, simply leave it blank. (You may wish to enter it, however for security reasons you should not). Once you have entered in the information, click on the OK button.

Now that we’re connected, you need to find your source file you wish to upload. The contents of your computer hard drive is on the left hand window. Simply find the file, and click on the file name. Once you have selected your file name, click on the right arrow (->) which is in the middle pane. This uploads your source code.

Now that the file has been uploaded, we need to connect to Aurora to compile and submit the job. To connect to Aurora, we will need to Start CRT (or a similar Telnet program). Start CRT by clicking on the Start button, click Programs, then choose CRT.

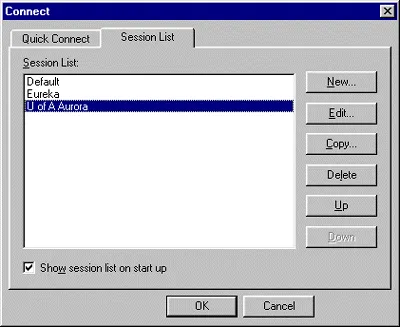
If you do not have the Aurora connection setup, then follow this step. Otherwise you may skip this step. Click on the New button.

If you do not have the Aurora connection setup, then follow this step. Otherwise you may skip this step. We need to fill out the appropriate information. In the Name box, you may call the connection whatever you like. We are calling it U of A Aurora. The Hostname or IP is filled in as: aurora.nic.ualberta.ca Once this is done, simply click on the OK button.
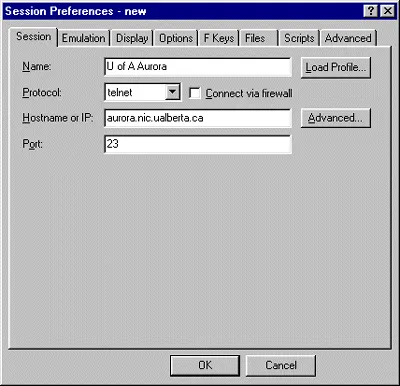
Now that we have the connection created, simply click on the U of A Aurora and then click OK.
Once connected, enter your login name, and your password. These are CASE SENSITIVE, so make sure you have entered the two pieces of information accordingly.
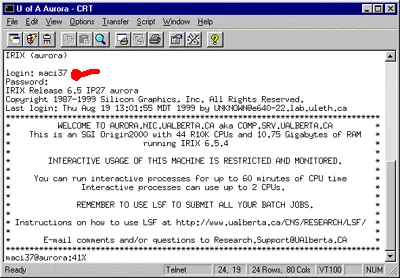
Now that we’re connected, we need to compile the test.for file that we uploaded. To compile the program, we would type: “f77 test.for -o test” The syntax for compilation is “f77

Now that the program has compiled (you will probably have some output on the screen regarding completion of compilation), you may now submit your job to the LSF queue. To submit your job to LSF, we need to start a program called bsub (bsub is used for serial/scalar processing). So at the command line, type “bsub” and hit enter.
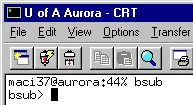
To submit your job, simply type “./test > myoutput” followed by the enter key. Note: the submission of your job is much like running your program interactively. In this case we are storing any screen output to a file called myoutput. If you wish to omit the screen information, the command would simply be “./test” followed by the enter key. Once you have typed that it, hit Control+D (HOLD down the CTRL key, and press the D key once). Please note: bsub is for scalar processing. If you need parallel processing use the following command instead: bmpirun -np numberofcpus jobname jobparameters where numberofcpus is the number of cpus you wish the jobs to be run on, jobname is the program (eg. ./test ) and jobparameters are any extra paramaters you wish to supply to the job.

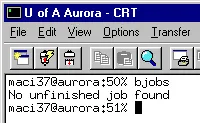
The job has now been submitted to the LSF queue. To check the status of your jobs, you can type in: “bjobs”

In the above example we see that a job is currently running. If your jobs are done, you will see the following:
Now that the job is finished, we can retreive our data via FTP. There should be an output file, called “myoutput”, and if your program outputs a data file, then you should have that as well. Start WSFTP and connect to the Aurora system to download your data files. When you connect with WSFTP you should notice your new data files on the right hand window. Click on them and then click on the Left Arrow (-) button to transfer the data files to your computer.

When you are done, you should “clean up” your files. Simply delete any files which you have created. If you wish to retreive account information (eg. cpu time, etc), use the “bacct” routine to check your account status.

If you wish to remove a job from the LSF queue, use the bjobs command to find out the JOBID number, and then use the bkill jobid# command to remove the job from the queue.

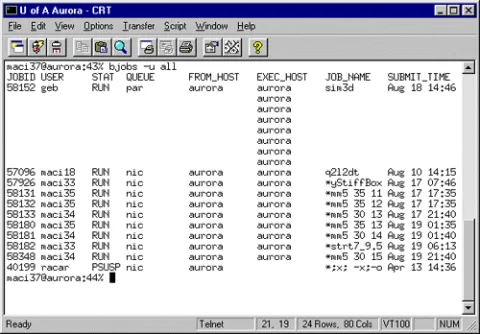
To find out what how many jobs are in the queue, use the “bjobs -u all” command
