Welcome to the University of Lethbridge
  • Library
  • Directory
  • Intranet
  • MyExperience
  • Webmail
  • Bridge
  • Moodle
Study here Give

Faculty of Education

Welcome to the University of Lethbridge
Close
  • About Us
    • Mission, Vision and Values
    • Our Faculty
    • Teachers of Tomorrow
  • Academic Programs
    • Graduate Programs
    • Undergrad Program
  • Internship
  • Research
    • Conducting Research
    • Funding Opportunities
  • Resources
    • Undergrad Advising
    • Student Links
    • Curriculum Laboratory
    • Grad Procedures
    • Faculty & Staff Portal
    • Professional Portfolios
    • Room/Equip Bookings
    • School Maps/Mileage
    • Technical Support
    • Legacy Magazine
    • Student Photo Email Release Form
    • Virtual Classroom
  • Alumni & Supporters
    • Alumni Giving
  • Contact Us
    • Faculty of Education Directory
    • Feedback
  • Library
  • Directory
  • Intranet
  • MyExperience
  • Webmail
  • Bridge
  • Moodle
Study here Give
Study here Give

Video Recording - Windows Guide

Video Recording - Windows Guide

Contact our IT team for any technology-related issues
Kevin Orr (kevin.orr@uleth.ca) or Scott Powell (scott.powell@uleth.ca)

Windows Camera

Image
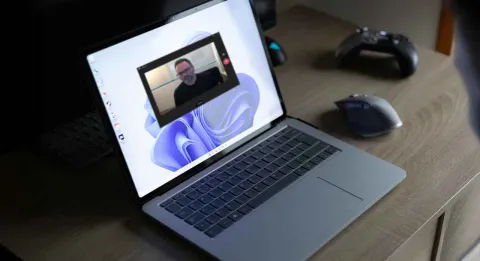
PC Camera App
Windows Camera is a built-in 
application available on Windows 
devices that allows users to take 
photos and record videos using 
their computer's built-in or connected 
camera. It features a simple interface, 
making it easy to capture quick 
images or video clips. 
 
This guide will walk you through 
how to use the Camera app to 
record sessions, export your 
recordings, and submit the final results.


Recording in the Camera app:
The application to use for recording is Camera. It is a simple one-click record/stop application that creates raw recordings. Videos can be edited using separate applications. 
 
IMPORTANT: Always record a quick test and play it back to ensure the audio and video are set properly 
 
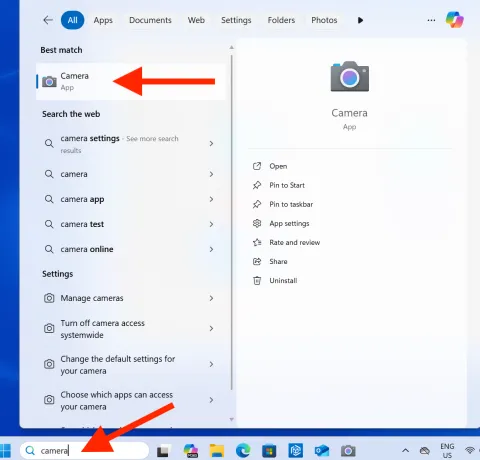
Camera Application:
 
Image
Camera App Select


  • Search "Camera"
  • Select the Camera app
    • If the application does not exist, you can
      install it HERE
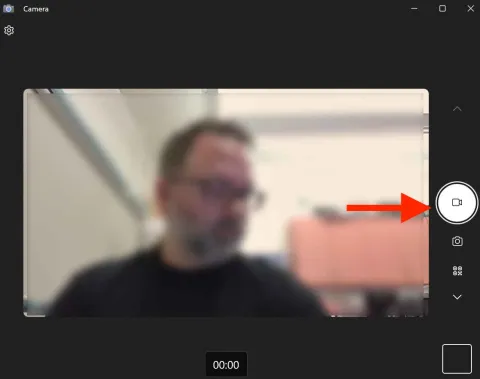
Starting a Recording:
 
Image
Camera - Camera Select


  • Select the record tab
  • When you are ready to record, click 
    the record button again
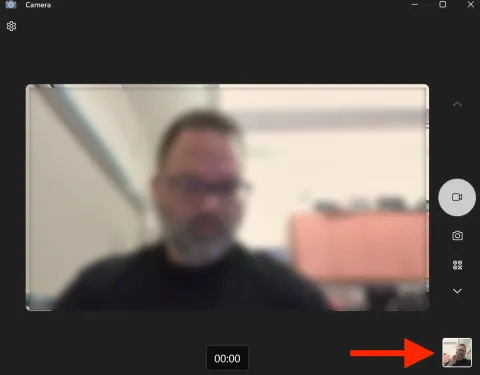
Stopping a Recording:
 
Image
Camera - Stored Recording


  • To stop the recording, click the stop button
  • Your recording will be placed within Camera's library


  • Recorded videos are automatically stored 
    within the Pictures folder 
  • There is no manual save feature.


Exporting:
Video files are automatically saved to the Pictures folder, where you can play them back and rename the recordings as needed.
 
IMPORTANT: We recommend recording a quick test video to ensure both audio and visuals are correctly set.
 
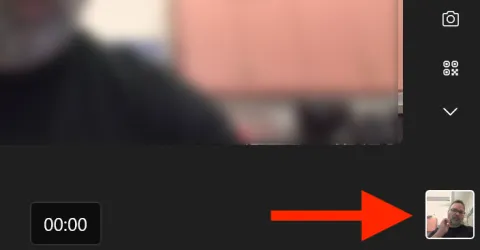
Camera Library
 
Image
Camera - Playback


  • Every recording is be placed 
    within Camera app's library 
    (bottom right)
    • There is no 'Save" action
  • To playback a recording, click the 
    recorded video and press Play
  • Only one recording will be shown
    within the Camera app (but all
    are automatically stored)
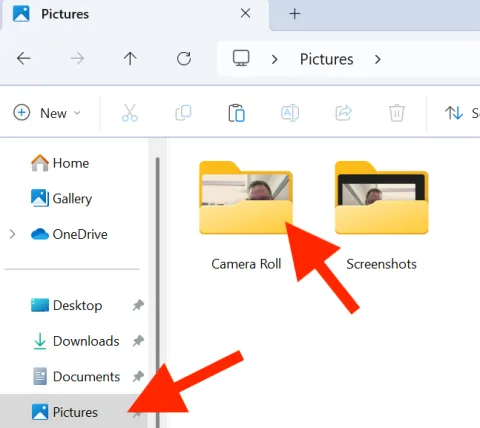
Camera Roll Folder
 
Image
Camera - Camera Roll
  • All videos are stored within the 
    Pictures folder
    • WIndows Explorer > 
      Pictures > Camera Roll
  • Simply locate and open the 
    recordings you wish to view
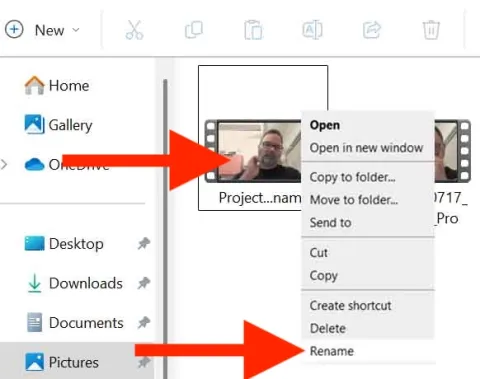
Rename
 
Image
File Rename
  • To rename the recording, 
    right-click on the file, 
    select Rename and type 
    a new name for the 
    recording

Uploading to OneDrive :
Your exported recording can be uploaded to OneDrive and shared by creating a shareable link.
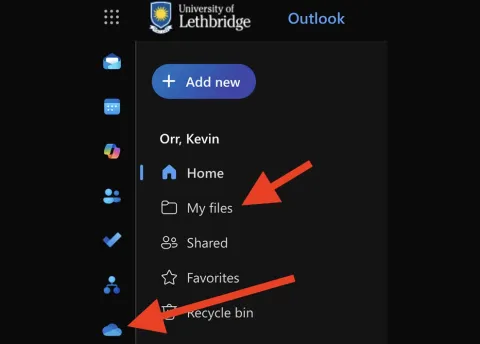
Login
 
Image
OneDrive My FIles
  • Open your webmail and log in with your UofL credentials
  • Click the OneDrive icon (left)
  • Click My Files
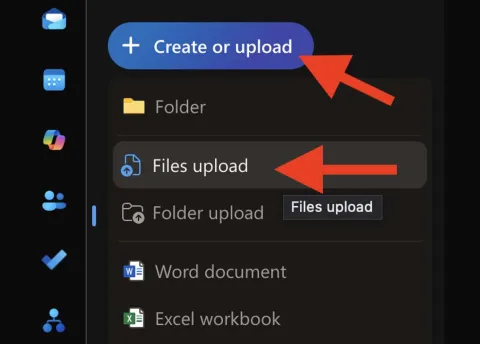
Upload
 
Image
OneDrive Files Upload
  • Click + Create or upload
  • Select Files Upload


Select Recording
 
Image
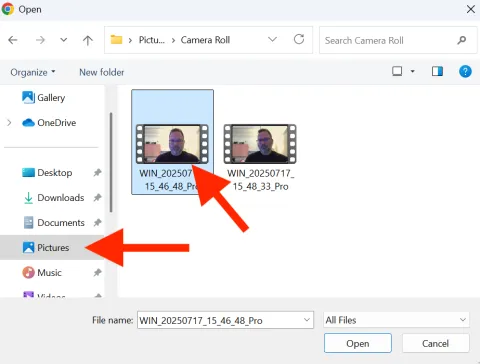
OneDrive - Video Select
  • Click Pictures > Camera Roll
  • Select your recording and click Open


  • Your recording will begin uploading
     to OneDrive

Editing Your Video:
Once your video has been uploaded to OneDrive (and before you share it), you can edit the clip right within OneDrive.
Playback
 
Image
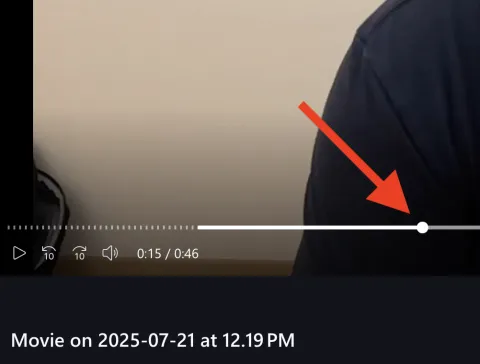
OneDrive - Playback Slider
  • Locate and open your video in 
    your OneDrive 
  • To playback your video, click
    the play button located in 
    the bottom left of the clip
  • You can manually playback
    the video by sliding the playback
    cursor


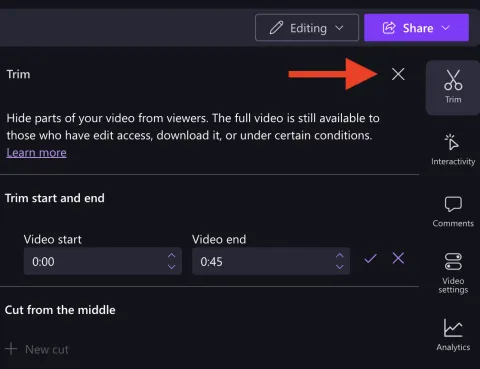
Trimming
 
Image
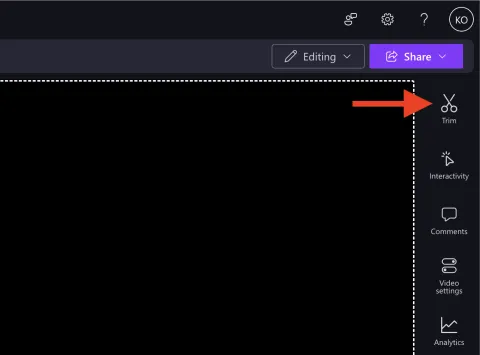
Video Trim


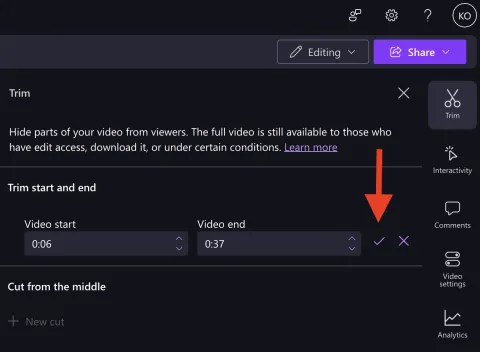
  • To start trimming your
    clip, click "Trim" 
Image
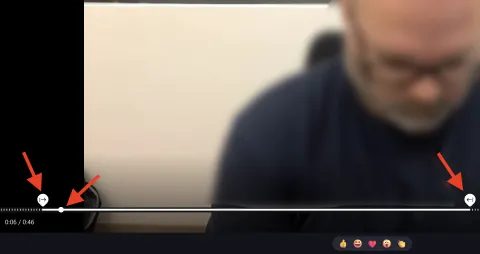
OneDrive - Video Trimming


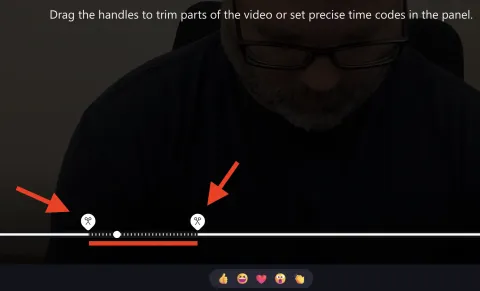
  • Move the trimming sliders to select 
    the portion you want to keep
    • Everything inside the sliders 
      will remain. while anything 
      outside (dotted) will be 
      trimmed away.
  • To play back your selected section, 
    position the playback slider 
    (white circle) at the start of your 
    trim and click Play
Image
OneDrive - Trim Confirm


  • To secure your trim, click 
    the check mark
  • If prompted, click "Confirm"
Cutting
 
Image
OneDrive - Video New Cut
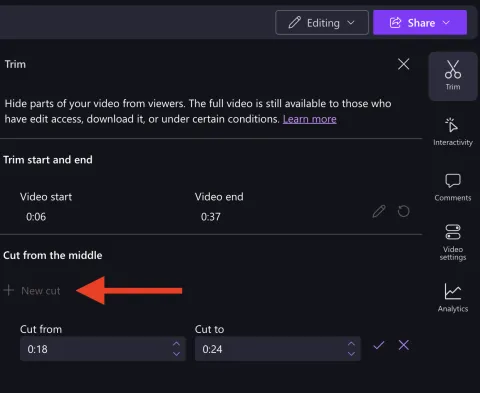
If you have a section in the middle of your 
recording you'd like to remove, follow these 
steps. If not, skip this section


  • To cut a section out of a clip,
    move the playback cursor to 
    where you want to start the cut,
    then click "New Cut" (on the right)
Image
OneDrive - Video Cutting
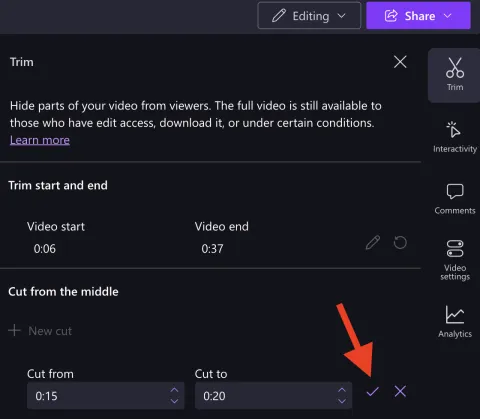
  • Move the sliders where you want
    to cut the clip
  • The dotted section is what you 
    are removing
Image
OneDrive - Video Cut Confirm
  • To secure your cut, click 
    the check mark
  • If prompted, click "Confirm"
Finishing
 
Image
OneDrive - Editing Videos
  • When you are done with your 
    edits, click the x next to Trim

Sharing to Moodle:
You may find that your video is too large to upload to Moodle. The following outlines how to create a shareable link to your video in OneDrive and insert it into Moodle.
Share
 
Image
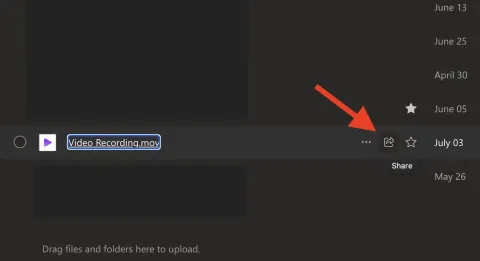
OneDrive Share
  • Locate your video in your OneDrive
    (previous step)
  • Click the Share button
Link to Moodle
 
Image
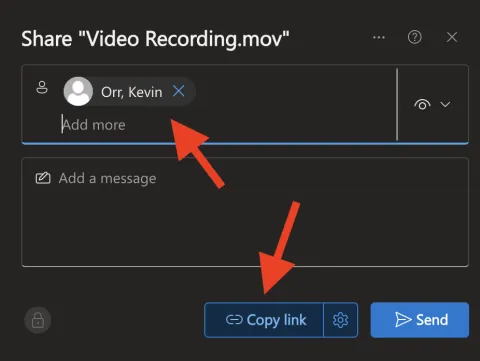
OneDrive Copy Link
  • Type the name of the person you 
    are sharing the file to
  • Click Copy Link
 
  • Sign in to Moodle and paste 
    the copied link in the location 
    where you want the video to appear


Related Links

  • News
  • Events
  • Services for Students
  • Apply Now

Connect with us

  • Stories
  • @ULethbridgeEdu
  • @ulethbridge_education

Academic Advising

  • TH421 (Turcotte Hall)
  • Mon - Fri, 8:30 a.m. – 4:30 p.m.

  • Advising Information

Faculty of Education

  • TH421 (Turcotte Hall)
  • Undergraduate Program
  • 403-329-2254
  • edu.sps@uleth.ca
  • Graduate Program
  • 403-329-2425
  • edu.masters@uleth.ca

Students

  • Academic calendar
  • Student Enrolment and Registrar Services
  • Student opportunities
  • Student services
  • Study here

Information for

  • Alumni
  • Donors
  • Visitors and community

Campus

  • Careers at uLethbridge
  • Events
  • Faculty and staff intranet
  • Maps and tours
  • News

Lethbridge Campus
4401 University Drive
Lethbridge, Alberta, T1K 3M4

Calgary Campus
Suite 6032, 345-6th Ave SE
Calgary, Alberta, T2G 4V1

Contact Us

Faculty & Staff Directory


Visit the University of Lethbridge Homepage

The University of Lethbridge is located on traditional Blackfoot Confederacy territory. We honour the Blackfoot people and their traditional ways of knowing in caring for this land, as well as all Indigenous peoples who have helped shape and continue to strengthen our University community.

Follow us on social media


©2025 University of Lethbridge | Terms of use