L1170B - Technology Guide
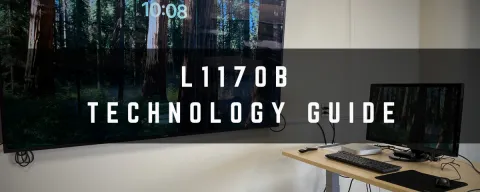
This short step-by-step guide provides instructions on connecting the camera, microphones, and laptop connections in L1170B
Turning on the TVs
- Aim the larger remote at the main TV and press the power button
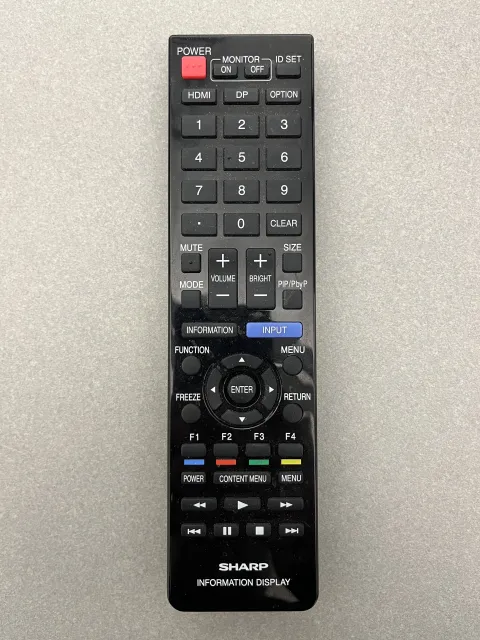
- Aim the smaller remote at the secondary TV (facing the TV on the right) and press power
Computer Login
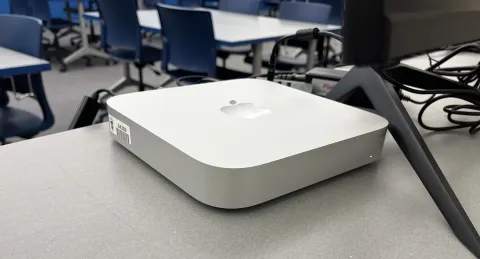
TH341 is equipped with a built-in Mac Mini. To wake it, move the mouse or press any key on the keyboard. If there's no response, the Mac Mini may be turned off.
Turning on the Mac Mini
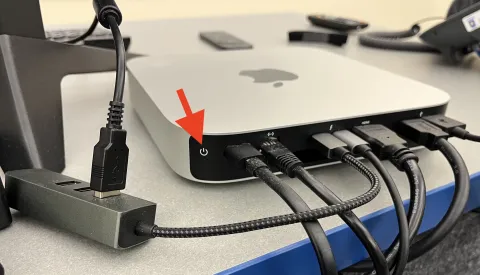
- Press the power button located on the back, left-hand side of the Mac Mini
Log into the Computer
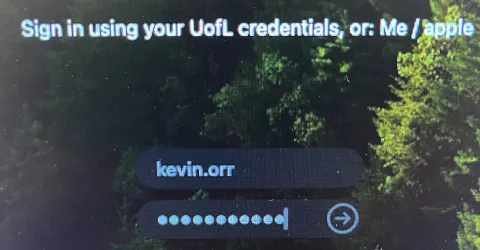
- Use your UofL username and password to log in.
Screen Mirroring
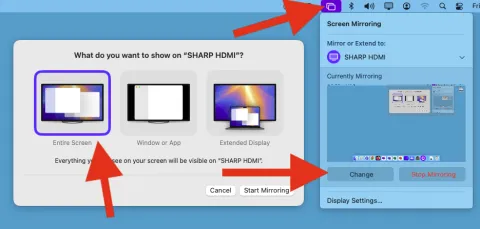
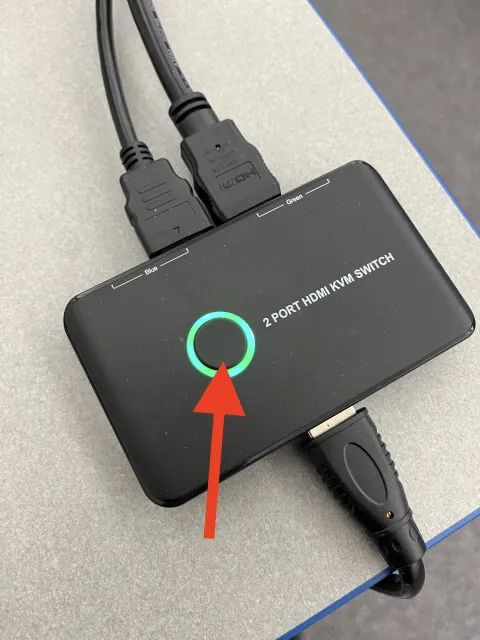
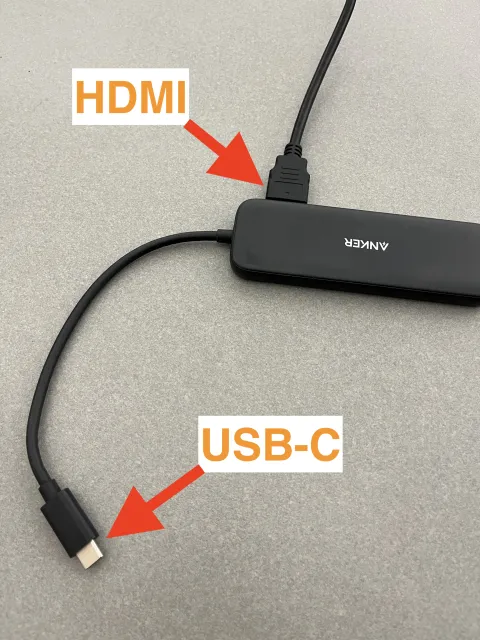
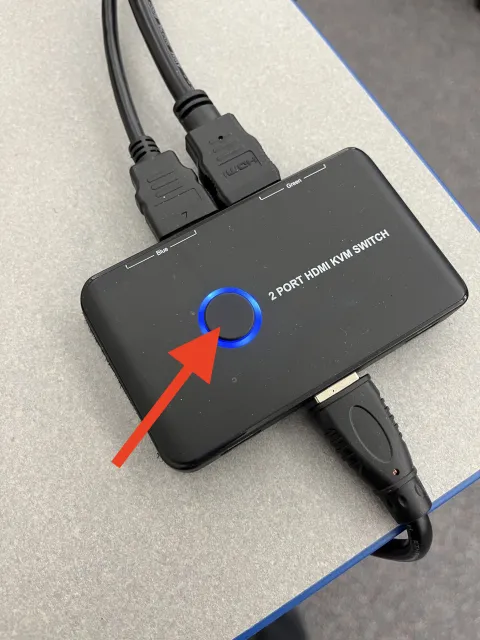
Device Switching
Microphone Connection

TH341 features a large ceiling microphone for full room coverage. Note that the microphone is connected only to the Mac Mini, so users must use it if they wish to use the microphone and wall-mounted camera.
Verify the Connection
- To verify the connection, check the back of the Mac Mini to ensure the audio cables are properly connected.
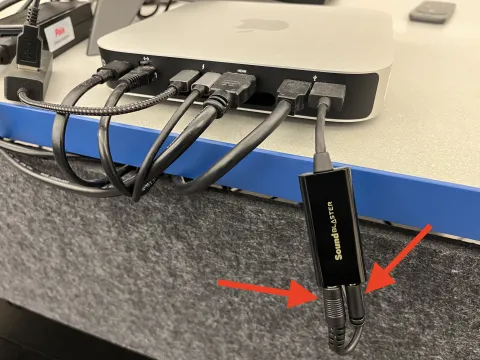
- Two audio cables should be connected at all times.
- If you notice that the cables have been disconnected, either plug them back in or go to TH348 for support
Microphone and Speaker Access - Zoom
To ensure the proper functionality of the microphone and speaker systems in Zoom:
- Open the Zoom application (the Zoom icon should be in the Dock)
- If the Zoom icon is not in the Dock, click the finder icon (bottom left), go into "Applications" and open Zoom
- Login:
- Click "Sign In"
- Click "SSO"
- Type uleth (as the company domain), then click "Continue"
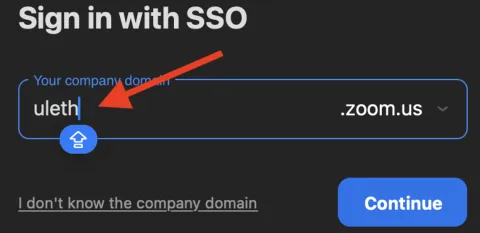
- Sign in using your UofL email and password
- When prompted, click "Open Zoom.us"
- Open your meeting
- In your meeting, click the dropdown next to the microphone icon (bottom left) and select "Sound Blaster Play! 3" for both the microphone and speakers.
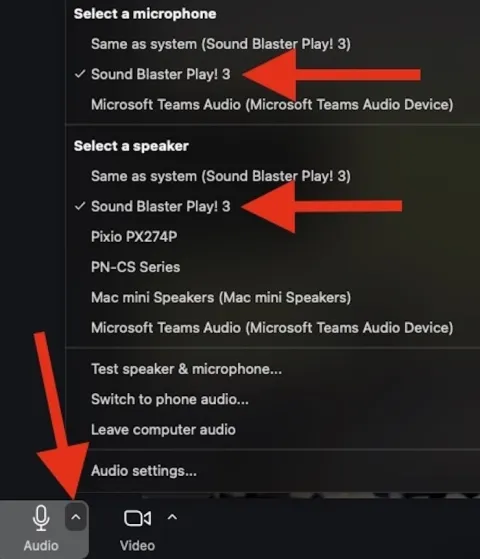
Microphone and Speaker Access - Teams
To ensure the proper functionality of the microphone and speaker systems in Teams:
- Open the Teams application (the Teams icon should be in the Dock)
- If the Teams icon is not in the Dock, click the finder icon (bottom left of the Dock), select Applications and open Microsoft Teams
- Login:
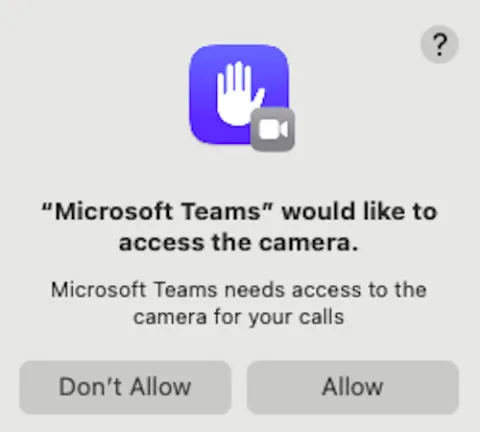
- Follow the onscreen prompts, logging in using your full UofL email and password, etc., and if prompted to allow Teams access to the camera and microphone, click Allow
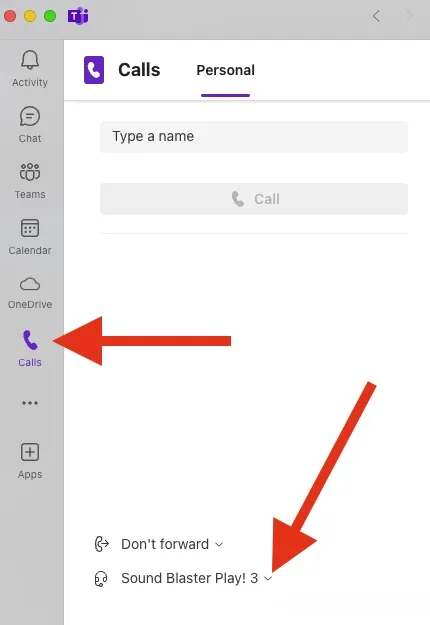
- To ensure the camera and microphone are connected, click Calls (on the left), then select the dropdown menu next to the headset icon
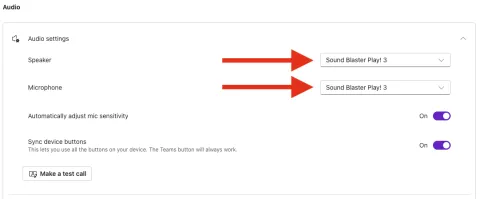
- Ensure both speaker and microphone are set to Sound Blaster Play! 3 by clicking the dropdown menu next to each section and selecting them (they should automatically connect, so manual selection is usually not necessary).
Camera Control – Presets & Manual Adjustment
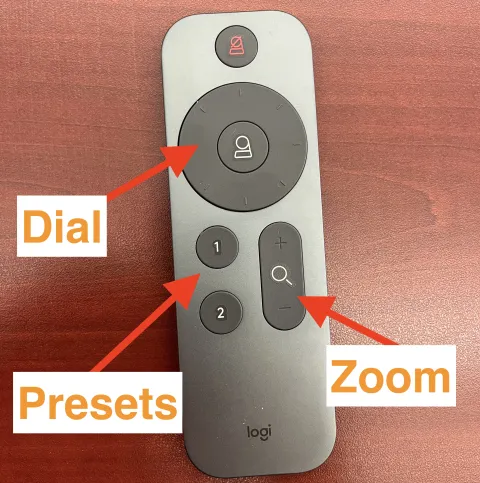
The camera in TH341 can be controlled using the camera remote, allowing for quick preset framing or manual adjustments, including zoom and pan.
Preset Framing
To use a preset, press 1 or 2 on the remote:
- 1 – Cose-up shot of the podium.
- 2 – Wide-angle shot of the classroom.
Manual Adjustments
- Zoom In/Out – Press and hold the Zoom + or Zoom - button.
- Pan (Move Camera Position) – Use the dial to adjust the camera direction.
- Press and hold for quick movement.
- Tap gently for precise adjustments.
Sound (Volume)
Here is how you manipulate the sound from the Mac Mini and laptop connections.
From the Main Computer
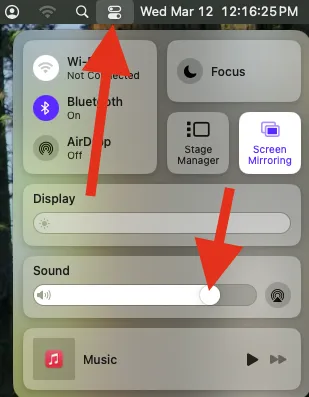
- After logging in, click the Control Center icon in the top right corner and adjust the sound slider manually.
From a Laptop
After connecting your laptop to the external HDMI and selecting the laptop source, the sound will play through the main TV.
Use the largest remote to adjust the volume by pressing the volume + or - buttons.

