Counselling - Video Recording Guide
Contact our IT team for any technology-related issues
Kevin Orr (kevin.orr@uleth.ca) or Scott Powell (scott.powell@uleth.ca)
Counselling Video Recording Guide
Image

| WelcomeThis guide provides step-by-step instructions for setting up and managing recordings in the counselling breakout rooms in Turcotte Hall. Equipment OverviewEach room is equipped with:
Recording SetupInstructions are provided for record, exporting and submitting counselling sessions. Azura Virtual DesktopThe guide also outlines how access the Azura Virtual Desktop |
The following steps will guide you through setting up a recording session.
Microphone Setup:
Before starting a recording, confirm that the microphone and sound output are set correctly. While these settings are typically preconfigured, it’s a good practice to double-check them before you begin.
Turn on Microphone: | |
Image

|
|
Connect via Bluetooth: | |
Image

|
|
Image

|
|
Sound: | |
Image

| The last step is to set the input and output sound
|
Set Output Sound: | |
Image

|
|
Set Input Sound: | |
Image

|
|
Plug it Back in: | |
Image

|
|
Microphone Setup:
Before starting a recording, confirm that the microphone and sound output are set correctly. While these settings are typically preconfigured, it’s a good practice to double-check them before you begin.
Turn on Microphone: | |
Image

|
|
Sound: | |
Image
| The last step is to set the input and output sound
|
Set Output Sound: | |
Image

|
|
Set Input Sound: | |
Image

|
|
Recording in Photo Booth:
The application to use for recording is Photo Booth. It is a simple one-click record/stop application that creates raw recordings without the ability to edit afterwards. Videos can be edited using separate applications.
Photo Booth Application: | |
Image

|
|
Starting a Recording: | |
Image

|
|
Stopping a Recording: | |
Image

|
|
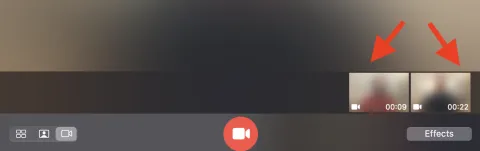
Video Playback:
We recommend playing back your videos to ensure audio and visuals were set properly. Always record a very quick test recording and play it back to check that everything is set properly.
Library | |
Image
|
|
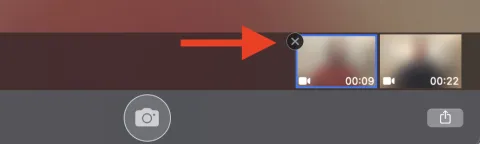
!! IMPORTANT !! | |
Image
|
|
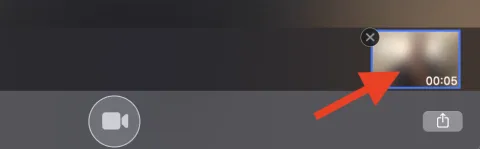
Playback | |
Image
|
|
Exporting Video in Photo Booth:
We are now going to export the video from Photo Booth so it can be saved to a USB drive, uploaded to OneDrive, or shared elsewhere.
Export: | |
Image

|
|
Save: | |
Image

|
|
Saving your Recording to USB:
Now that your video has been exported, we are going to copy the file to a USB stick.
Insert USB Stick: | |
Image

|
|
Copy Video | |
Image

|
|
The following steps outline how to access Azura Virtual Desktop.
Saving your Recording to USB:
Now that your video has been exported, we are going to copy the file to a USB stick.
Azura Desktop Link: | |
Image

|
|
Login | |
Image

|
|
DSB General Use | |
Image

|
|
Image

|
|
Image

|
|
Sign Out | |
Image

|
|